Here at Luke Photography, it is time to start building new sets and painting new backgrounds for the upcoming senior portrait season. This year, I've decided to add a few new grungy backgrounds to the options that I have for senior pictures. One background is authentically weathered and beaten down, the other had to appear that way.
I visited a salvage yard that sells old architectural parts that are taken from buildings that are slated for demolition or major renovation, and purchased couple of pairs of old exterior shutters that are 8 feet tall. Years of sun exposure and weather have cracked, peeled and faded the paint, and they had a beautiful patina on them. All it took was a wire brush to scrape off the loose paint, and they were good to go.
I acquired five fiberglass interior doors in the past 6 months. Didn't pay a dime for them. Three were being thrown out, and I rescued them before they hit the dumpster. The last two doors were near the curb in my neighborhood on trash day. Score. Now I had to make them look as old as the shutters, without waiting 80 years. Yeah, I'm a little impatient.
Scouring the internet, I came across a DIY chalk paint recipe and crackle painting technique that I used to apparently speed up the aging process of these doors. Because I had five doors, I had ten sides that I could paint. I decided to paint one side of the door a light color and the other side a darker color, so I had a lot of options once the doors were done.

The paint itself is just latex house paint. I have numerous cans of leftover paint from home projects that I used, and my studio landlord offered a few more colors that I found interesting.
Chalk paint was used around the turn of the century and had limestone in it to make it durable. To make the DIY chalk paint recipe, I mixed 1/3 cup of water and 1/3 cup of plaster of paris in a cup to make a water slurry. This then gets mixed into 1 cup of paint. You can't store or re-use this paint mixture, so only mix what you'll use for one coat, and mix it just before you are going to use it. This 1 1/3 cup of DIY chalk paint is reportedly more than enough to paint a dresser, so I cut back the recipe by half, so I didn't throw as much out after only painting one side of a door.
The key to a good crackle finish is to have highly contrasting colors of paint on the door so that the cracks in the paint really show up well.. If you want a finished door with a light color, a very dark color has to be the base coat, and if your finished door is going to be a dark color, the base color has to be a very light color. For the darker colored doors, I just used white primer paint as my base coat, and for the lighter colored doors, my base coat was black, or very dark grey or brown.
 |
| Applying base coat for a light-colored door |
 |
| Finished base coat for light-colored door |
Once the base coat on the door dry, then I was ready to start the crackle paint technique. On top of the dry base coat I painted each door with a coat of white glue. I bought a 1-gallon container of Elmer's glue from my local art supply store, and will probably use at least half of it for the 10 door sides. The second (top) coat has to be painted when the glue is tacky and starting to dry. The glue coat has to be fairly thick, otherwise it will dry too quickly, and you will have lost the window of opportunity to apply the top paint coat and get the crackle finish. A thicker coat of glue also results in larger cracks in the top coat of paint when it is dry.
 |
| Starting the glue coat |
 |
| Finished coat of glue |
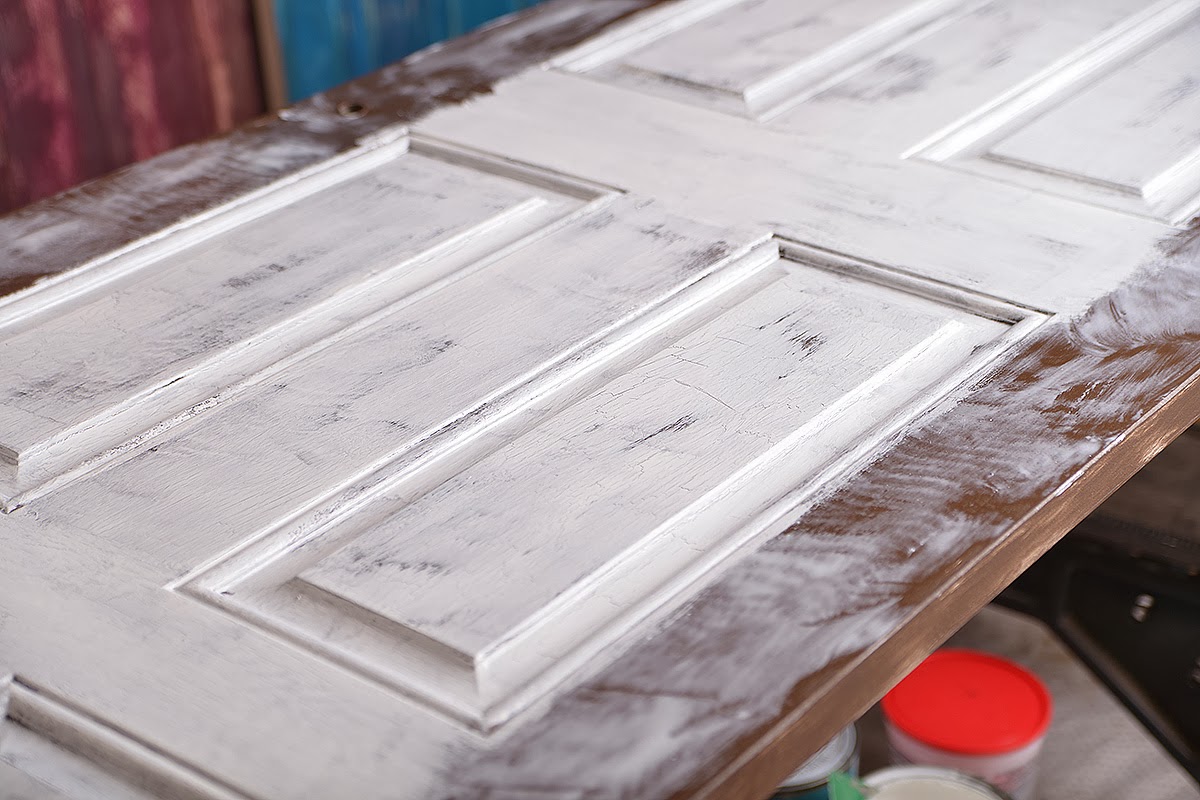
When the glue started to set up and was tacky, I started painting the top coat of DIY chalk paint on the door. I painted in the same sequence that I painted the glue on, so that the glue was in the same state of dryness as the top coat was applied. The top coat has to dry for several hours. Once it was dry, I rubbed a light coat of dark wood stain over the entire door, which helped it to look old and dirty.
 |
| Starting the top paint coat |
 |
| Top coat almost finished |
 |
| Glue and top paint coat starting to dry |
 |
| Applying wood stain |
 |
| Before and after |
 |
| Detail of finished door |
 |
Several finished doors
 |
| Miley, my studio companion with the new "old" doors |
|


No comments:
Post a Comment